
Safety Precautions and Warnings
Read all instructions before using the Kenmore gas stove. Ensure proper installation and leveling to avoid hazards. Keep flammable materials away from burners and oven. Never leave cooking unattended. Always turn off knobs when not in use. Ensure ventilation is adequate to prevent gas buildup. Keep children away from the stove. Regularly inspect burners and igniter for blockages. Follow LP gas conversion instructions carefully to avoid risks. In case of malfunction, turn off the gas supply immediately. Never use abrasive cleaners on surfaces to prevent damage. Always use oven mitts when handling hot cookware. Follow all safety symbols and guidelines provided in the manual to ensure safe operation and prevent potential fire or explosion risks.
- Do not operate burners near flammable liquids or gases.
- Avoid using the stove if any parts are damaged or malfunctioning.
- Ensure the oven door is closed securely during operation.
Failure to follow these precautions may result in serious injury or property damage. Always refer to the manual for specific safety guidelines and maintenance tips.
1.1 Essential Safety Information
Read all instructions carefully before using the Kenmore gas stove. Ensure proper installation and leveling to prevent hazards. Keep flammable materials, such as curtains or towels, away from burners and the oven. Never leave cooking unattended, especially when using high flames. Always turn off knobs when not in use to avoid gas leaks. Ensure adequate ventilation to prevent carbon monoxide buildup. Keep children and pets away from the stove to avoid accidents. Regularly inspect burners, igniter, and connections for blockages or damage. Follow all safety symbols and guidelines in the manual to ensure safe operation and prevent potential risks.
- Do not operate the stove near open windows or doors that could cause drafts.
- Avoid using abrasive cleaners, as they may damage surfaces.
- Never use the oven or burners if any parts are malfunctioning.
Adhering to these essential safety practices will help ensure a safe and efficient cooking experience with your Kenmore gas stove.
1.2 Hazard Warnings and Precautions
WARNING: Improper use of the Kenmore gas stove can result in fire or explosion. Always follow the manual’s instructions precisely. Do not operate the stove if any parts are damaged or malfunctioning. Ensure proper ventilation to prevent carbon monoxide buildup. Never use flammable liquids or aerosols near the stove. Keep the area around the burners and oven clear of combustible materials. Avoid using abrasive cleaners, as they may damage surfaces. Do not attempt repairs unless specified in the manual. If converting to LP gas, follow the manual’s conversion instructions carefully to avoid hazards. Always turn off the gas supply if you suspect a leak or malfunction.
- Do not leave the stove unattended during operation.
- Keep children and pets away from the stove and controls.
- Never use the oven or burners as a heating source.
Failure to comply with these warnings may result in serious injury or property damage. Always prioritize safety when operating your Kenmore gas stove.
1.3 Installation Safety Requirements
Ensure the Kenmore gas stove is installed by a qualified technician to meet safety standards. The stove must be placed on a level, stable surface, away from flammable materials. Maintain a minimum distance of 3 inches from combustible surfaces unless protected by heat-resistant material. Properly connect gas lines to avoid leaks, ensuring all connections are secure and leak-tested. Install a gas shut-off valve within 6 feet of the stove. Ensure adequate ventilation to prevent carbon monoxide buildup. Follow local building codes and manufacturer guidelines for installation. Never install the stove near water sources or in areas prone to moisture accumulation. Always refer to the manual for specific installation instructions and safety recommendations.
- Ensure the stove is grounded to prevent electrical hazards.
- Keep the area clear during installation to avoid accidents.
- Do not connect the stove to an existing gas line without proper inspection.
Improper installation can lead to serious safety risks, including gas leaks or fires. Always comply with local regulations and manufacturer guidelines for a safe setup.
Operating the Gas Surface Burners
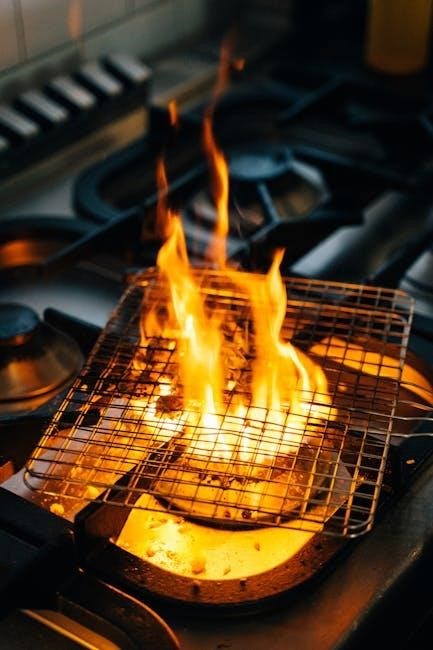
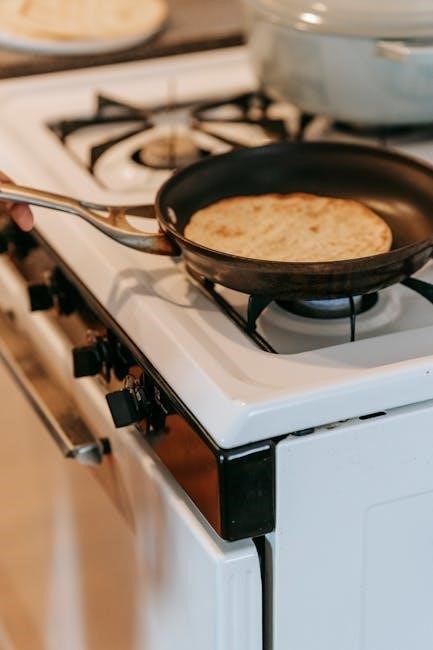
To operate the Kenmore gas surface burners, place cookware on the burner and press the control knob in, turning counterclockwise to ignite. Adjust flame height as needed for cooking. Always monitor the flame and ensure it is stable. Keep the cooking area clear of flammable materials. Clean burners regularly to maintain performance and safety. Never leave cooking unattended, especially when using high flames. Follow the manual for specific burner operation guidelines to ensure safe and efficient use.
- Ensure the burner cap is properly aligned for even flame distribution.
- Avoid overheating cookware before adding food or liquid.
2.1 Lighting and Using the Burners
To light the Kenmore gas surface burners, ensure the cookware is properly placed on the burner. Push the control knob in and turn it counterclockwise to release gas. Click the igniter to light the burner. Once lit, adjust the flame height by turning the knob clockwise or counterclockwise. Always monitor the flame for stability and adjust as needed for cooking. Place cookware before igniting to prevent gas buildup. Avoid overheating cookware before adding food or liquid. Keep the cooking area clear of flammable materials. Follow the manual for specific burner operation guidelines to ensure safe and efficient use.
- Ensure the burner cap is properly aligned for even flame distribution.
- Use cookware with flat, heavy bottoms for better heat distribution.
2.2 Adjusting Flame Height and Monitoring
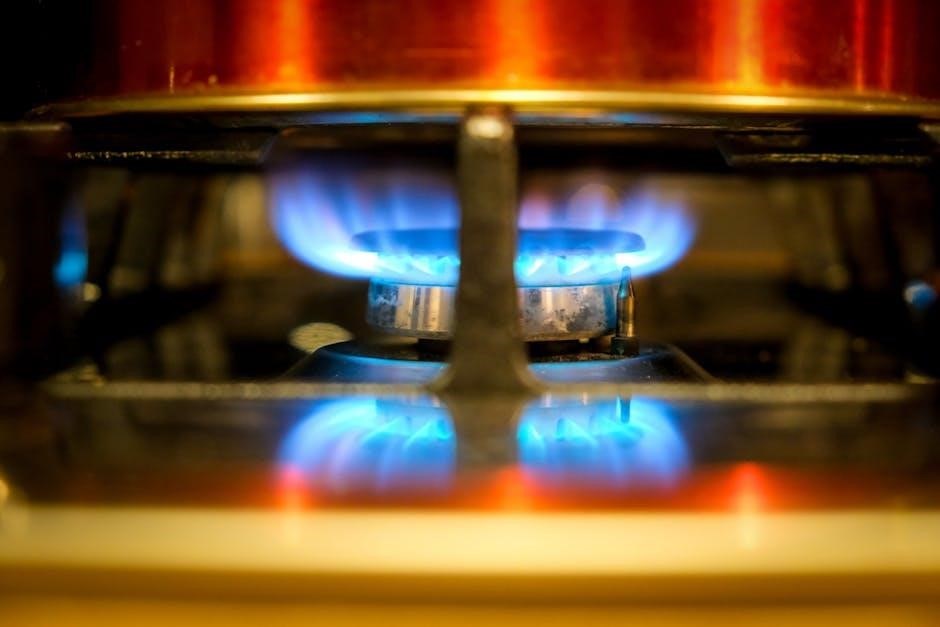
Adjust the flame height on your Kenmore gas stove by turning the control knob clockwise for a smaller flame or counterclockwise for a larger flame. Monitor the flame color; a blue flame indicates proper combustion, while a yellow or orange tint may signal an issue. Ensure the burner cap is properly seated for even heat distribution. Avoid overheating cookware before adding food or liquid to prevent hot spots. If the flame goes out, turn off the burner and wait before relighting. Always keep a watchful eye on cooking to avoid burns or spills. Adjust the flame as needed for optimal cooking results.
- Use the correct cookware size to match the burner for efficient heating.
- Never leave cooking unattended, especially when using high flames.
2.3 Troubleshooting Common Burner Issues
Identify and resolve burner issues promptly for safe and efficient cooking. If the flame is uneven or too low, check for blockages in the burner ports and clean them with a toothbrush. Ensure the burner cap is properly aligned and secure. If the burner doesn’t ignite, verify that the knob is functioning correctly and the gas supply is on. For a clicking igniter that doesn’t light, reset the stove by turning off the power and waiting 30 seconds before retrying. Avoid using abrasive cleaners, as they may damage burner surfaces. Regularly inspect and clean burners to prevent clogs and ensure proper flame performance.
- Clean burner ports with a small brush or toothpick to remove food debris.
- Ensure the burner cap is dry and free of food residue for proper ignition.
Using the Gas Oven
Preheat the oven to the desired temperature using the control knob. Ensure accurate temperature settings for consistent cooking results. Monitor the oven temperature regularly for optimal performance. Always preheat before placing food inside. Keep the oven door closed during cooking to maintain heat. Proper ventilation is essential to prevent gas buildup. Clean the oven racks and place cookware correctly for even cooking. Follow the manual’s guidelines for specific cooking modes and temperature adjustments to achieve the best results.
3.1 Preheating and Setting Oven Controls
Turn the oven control knob to the desired temperature and press the start button to begin preheating. Ensure the oven is preheated for at least 10 minutes before cooking. Use the bake or broil mode by selecting the appropriate option on the control panel. For precise temperature control, enter the exact degree using the numeric keypad. The oven will signal when it reaches the set temperature. Always monitor the preheat cycle to ensure accuracy. Adjust the temperature as needed for specific recipes. Keep the oven door closed during preheating to maintain heat efficiency. Refer to the manual for model-specific instructions and additional tips for optimal performance.
3.2 Cooking Modes and Temperature Management
Select the desired cooking mode (Bake, Broil, Convection, or Roast) using the oven control panel. Adjust the temperature by turning the knob or pressing the digital buttons. Use the convection mode for even cooking and faster results. Monitor the temperature display to ensure accuracy. For precise control, enter the exact temperature using the keypad. Press Start to activate the selected mode. Use the convection fan for uniform heat distribution. Always refer to the manual for specific mode recommendations. Adjust cooking times and temperatures based on recipe requirements. Ensure proper ventilation when using high-heat modes. Regularly check food with a thermometer for doneness. Follow the manual guidelines for optimal cooking performance and food safety.
3.4 Oven Maintenance and Cleaning Tips
Regularly clean the oven to maintain performance and hygiene. Use the self-cleaning feature for heavy-duty cleaning. Wipe up spills immediately with a damp cloth to prevent hardening. Remove racks and place them in soapy water for easy cleaning. Avoid using abrasive cleaners or scouring pads, as they may damage surfaces. For tough stains, apply a gentle oven cleaner and follow the product instructions. Always wear gloves and ensure the oven is cool before cleaning. Check the manual for recommended cleaning products and schedules. Never use flammable materials or harsh chemicals. Keep the oven vent clear to ensure proper airflow and safe operation.
Installation and Setup
Follow the manual for installation steps. Ensure the stove is placed on a stable, heat-resistant surface. Secure all connections tightly. Use a level to ensure even positioning. Test all burners and the oven after installation to ensure proper function. Keep the area clear during setup. Refer to the manual for specific electrical and gas line requirements. Professional installation is recommended to avoid safety hazards and ensure compliance with local regulations. Double-check all connections before first use to prevent leaks or malfunctions.
4.1 Positioning and Leveling the Stove
Position the Kenmore gas stove on a stable, heat-resistant surface. Ensure the stove is at least 30 inches away from flammable materials. Use a spirit level to ensure the stove is perfectly horizontal. Adjust the legs by turning them clockwise or counterclockwise until the stove is level. Verify the level both front-to-back and side-to-side. If necessary, place shims under the legs for final adjustments. Once leveled, secure the stove to the floor using anti-tip brackets provided. Ensure all connections are accessible and not obstructed. Proper leveling prevents uneven cooking and potential safety hazards. Follow the manual for precise instructions to ensure accurate installation.
- Check the manual for specific clearance requirements.
- Ensure the surface is clean and free from debris before placing the stove.
4.2 Gas Line Installation and Connection
Ensure the gas line installation and connection are performed by a qualified technician to avoid hazards. Use a gas line of appropriate size and material, as specified in the manual. Connect the gas supply line to the stove’s inlet, ensuring all fittings are secure. Apply a small amount of pipe dope or Teflon tape to threaded connections for a leak-tight seal. After installation, test for leaks using a gas leak detector or soapy water solution. Turn off the gas supply immediately if a leak is detected. Always follow local plumbing codes and manufacturer guidelines for safe installation.
- Use the correct pipe size to maintain proper gas flow.
- Ensure all connections are tight and leak-free.
- Refer to the manual for specific connection requirements.
Improper installation can lead to gas leaks or fires, so adhere to all safety guidelines carefully.
4.3 Converting to LP Gas (If Applicable)
Converting your Kenmore gas stove to LP gas requires careful adjustments to ensure proper operation. Start by locating the pressure regulator and burner orifices. Replace the natural gas orifices with LP-specific ones, as specified in the manual. Adjust the oven pilot screw to accommodate the higher pressure of LP gas. After conversion, test all burners and the oven to ensure they light and function correctly. If unsure, consult a professional to avoid risks. Proper conversion is essential for safety and performance.
- Use only LP-rated parts for conversion.
- Follow the manual’s specific instructions for LP setup.
- Test all burners and the oven after conversion.
Improper conversion can lead to unsafe operation or damage, so proceed with caution and refer to the manual for detailed guidance.

Maintenance and Troubleshooting
Regularly clean burner caps and ensure proper gas flow. Check igniter function and burner orifices for blockages. Address unusual noises or smells promptly. Refer to the manual for troubleshooting guides and replacement parts. Proper maintenance ensures safe and efficient stove operation.
- Inspect burner orifices for blockages and clean as needed.
- Ensure igniter sparks consistently for proper flame ignition.
5.1 Cleaning and Caring for Stove Surfaces
Regular cleaning ensures optimal performance and longevity of your Kenmore gas stove. Wipe surfaces daily with a damp cloth to remove spills and splatters. For tougher stains, use a mild detergent and water solution, avoiding abrasive cleaners that may damage finishes. Burner caps and grates can be soaked in warm soapy water before scrubbing. Dry all surfaces thoroughly after cleaning to prevent water spots. For stainless steel or porcelain surfaces, use specialized cleaners to maintain their appearance. Avoid using harsh chemicals or scouring pads, as they may scratch or discolor the stove. Always refer to the manual for specific cleaning recommendations.
- Use vinegar and water for a natural, streak-free shine on surfaces.
- Avoid cleaning burner openings or igniter areas with liquid cleaners.
- Inspect and clean burner caps regularly to ensure proper flame distribution.
Proper care extends the life of your stove and maintains its aesthetic appeal.
5.2 Diagnosing Common Issues
Identify common issues with your Kenmore gas stove by observing performance. If burners fail to light, check for clogged burner ports or a faulty igniter. Uneven flames may indicate misaligned burner caps or blocked vents. If the oven isn’t heating, ensure the gas supply is on and the pilot light is lit. For recurring issues, consult the manual for troubleshooting guides or contact a professional. Regular maintenance can prevent many problems, ensuring safe and efficient operation.
- Check burner caps for proper alignment and cleanliness.
- Inspect igniter electrodes for damage or food residue.
- Ensure gas supply lines are secure and undamaged.
Addressing issues promptly prevents further damage and maintains stove functionality.
5.3 Replacing Parts and Filters
Replace worn or damaged parts promptly to ensure optimal performance. Turn off the gas supply and allow the stove to cool before starting repairs. For burner caps, igniter electrodes, or oven racks, refer to the manual for specific part numbers and replacement procedures. Use a screwdriver to remove screws securing parts like burner grates or drip pans. Clean or replace filters as needed to maintain proper ventilation. Always follow the manufacturer’s guidelines for replacing parts to avoid damage or safety risks. Ensure all connections are secure after replacement to prevent gas leaks or malfunction.
- Clean burner caps with mild soap and water before reinstalling.
- Replace igniter electrodes if they are worn or corroded.
- Order authentic Kenmore parts for compatibility and safety.
Regular replacement of worn parts ensures efficient and safe stove operation.
Leave a Reply
You must be logged in to post a comment.