Safety Precautions
Always read the manual before using the drill press. Wear protective equipment like safety glasses and gloves. Ensure the workpiece is securely clamped to prevent movement. Avoid loose clothing and long hair near moving parts. Keep children away from the machine. Never touch the drill bit immediately after drilling, as it may be hot. Check for wiring and pipes before drilling into walls or ceilings. Maintain a clean workspace to avoid accidents. Regularly inspect the tool for damage or wear.
1.1 Reading the Manual
Reading the manual is essential before operating the drill press. It provides critical safety instructions, setup guidelines, and maintenance tips. Understand the machine’s components, such as the spindle, chuck, and arbor, to ensure proper use. Familiarize yourself with assembly steps, like installing the hood body, and learn about spindle speed selection. The manual also covers troubleshooting common issues, like drill bit slippage or improper hole alignment. Always save the manual for future reference and refer to it when needed. This step ensures safe and efficient operation of the drill press.
1.2 Wearing Protective Equipment
Always wear protective equipment when operating a drill press to minimize risks. Safety glasses or goggles are essential to protect eyes from flying debris. Use gloves to maintain a firm grip and prevent hand injuries. Avoid loose clothing or long hair that could get caught in moving parts. Steel-toe shoes are recommended to safeguard feet from falling objects. Ensure all personal protective gear fits properly and is in good condition. Regularly inspect equipment for wear or damage. Proper attire and gear significantly reduce the risk of accidents, ensuring a safer working environment for effective drilling operations.
1.3 Securing the Workpiece
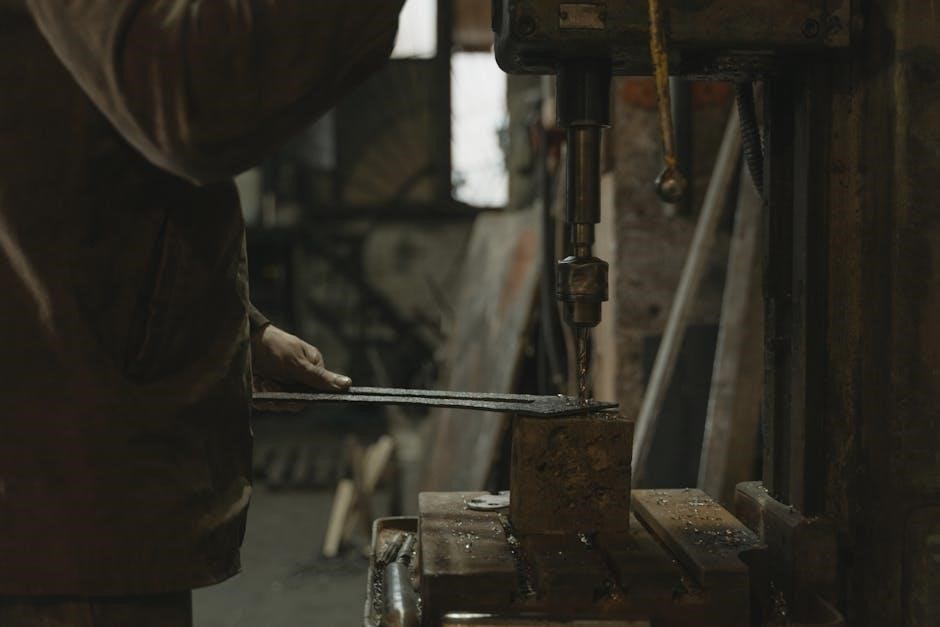
Properly securing the workpiece is crucial for safe and accurate drilling. Use clamps or vises to hold the material firmly in place, preventing movement during operation. Ensure the workpiece is aligned correctly with the drill bit. Avoid using damaged or loose clamping devices, as they may fail under pressure. For large or uneven materials, consider additional support to maintain stability. Always double-check the setup before starting the drill. A securely fastened workpiece reduces the risk of accidents and ensures precise hole placement, making the drilling process safer and more efficient for all applications.

Understanding the Drill Press Components
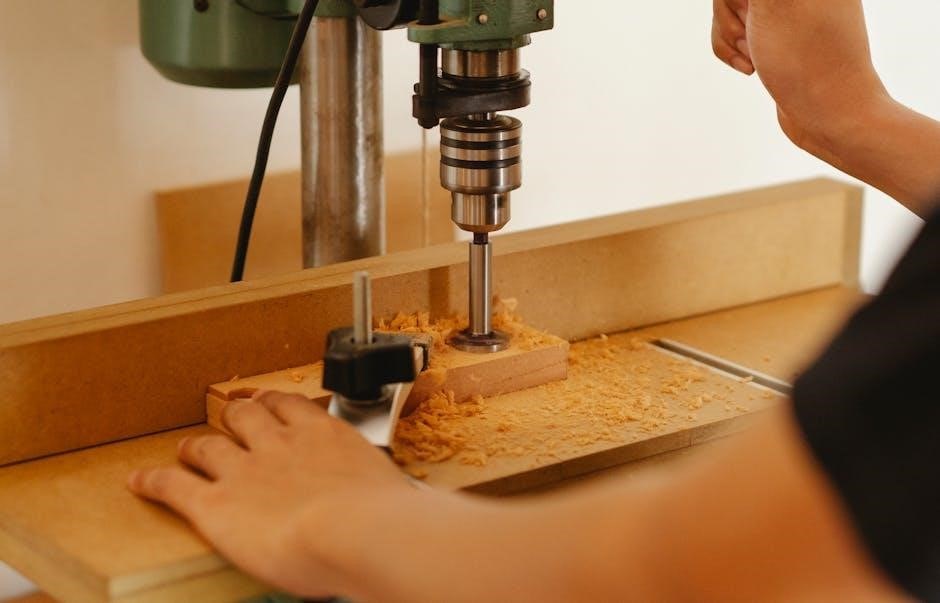
The drill press consists of a base, column, spindle, chuck, and table. The motor powers the spindle, which rotates the drill bit. Understanding these parts aids in proper operation and maintenance.
2.1 Identifying Key Parts
The drill press features a base for stability, a column that houses the spindle, and a table to support the workpiece. The chuck secures the drill bit, while the motor powers the spindle. Additional components include pulleys and belts for speed adjustment, a quill for spindle movement, and a drill chuck key for tightening bits. Understanding these parts is essential for proper operation and maintenance. Familiarizing yourself with their locations and functions ensures safe and efficient drilling. Always refer to the manual for detailed component identification and descriptions.
2.2 Spindle and Chuck Assembly
The spindle is the core component of the drill press, rotating the chuck and drill bit. The chuck securely holds the drill bit in place, ensuring precise drilling. Always use the correct chuck key size to tighten or loosen the chuck. The quill surrounds the spindle, allowing it to move up and down. Proper alignment of the spindle and chuck is critical for accurate drilling. Regularly inspect the assembly for wear or misalignment. Lubricate moving parts as specified in the manual to maintain smooth operation. Misuse or neglect can lead to damage or unsafe conditions.
2.3 Arbor and Drill Bit Setup
Properly set up the arbor and drill bit for accurate drilling. Insert the drift key into the chuck and lightly tap to remove the arbor. Align the drill bit with the arbor’s center, ensuring it is securely fastened. Use the correct chuck key size to tighten the chuck. Always refer to the manual for specific instructions on attaching and aligning the arbor. Misalignment can cause damage or unsafe operation. Ensure the drill bit is properly seated to avoid slippage during drilling.
Setting Up the Drill Press
Attach the hood body using the installation template and Ø10mm drill bits. Select the correct spindle speed based on the drill size. Ensure pulley belts are properly aligned for smooth operation. Refer to the manual for specific setup instructions to avoid errors. Secure all components tightly before use.
3.1 Installing the Hood Body
To install the hood body, align the installation template with the drill press. Use a Ø10mm drill bit to create holes at points C, D, E, and F as specified. Tap Ø10mm plastic dowels into these holes to secure the hood body properly. Ensure all screws are tightened firmly to maintain stability. Follow the manual instructions carefully to avoid misalignment or damage. Double-check the template positioning before drilling to ensure accuracy. Refer to the safety precautions section for additional guidelines during setup.
3.2 Selecting the Correct Spindle Speed
Selecting the correct spindle speed is critical for efficient and safe drilling; Refer to the manual for specific speed recommendations based on the drill bit size and material type. Generally, smaller drill bits require higher speeds, while larger bits need lower speeds to prevent overheating. Always start with a slower speed and gradually increase as needed. Excessive heat can damage the tool or workpiece. Ensure the spindle speed aligns with the material being drilled, such as metal, wood, or plastic, for optimal results. Proper speed selection enhances accuracy and extends tool life. Consult the manual for detailed guidelines and troubleshooting tips.
3.3 Aligning Pulley Belts
Proper alignment of pulley belts is essential for smooth operation. Start by loosening the motor mounting bolts to adjust the motor position. Align the pulleys by ensuring they are parallel and properly seated. Tighten the bolts gradually, checking alignment with a straightedge. Misaligned belts can cause uneven wear or belt slippage. Once aligned, test the drill press at a low speed to ensure proper function. Regularly inspect the belts for signs of wear or cracking. Replace worn belts immediately to maintain performance and safety. Always refer to the manual for specific alignment procedures and recommendations.
Operating the Drill Press
Start the drill press at a low speed, gradually increasing as needed. Always maintain control of the machine. Monitor the drill bit’s condition and adjust depth settings carefully. Keep hands away from moving parts during operation. Ensure the workpiece remains securely clamped throughout the drilling process. Periodically inspect the drill bit for wear or damage. Avoid applying excessive force, as this can damage the tool or workpiece. Always follow the manual guidelines for optimal performance and safety.
4.1 Clamping the Workpiece
Properly clamping the workpiece is essential for accurate drilling and safety. Use high-quality clamps or a vise specifically designed for drill presses. Ensure the workpiece is flat and stable before clamping. Tighten clamps firmly but avoid over-tightening, which could damage the material. Double-check the alignment of the drill bit with the marked drilling point. Looseness during drilling can lead to misaligned holes or accidents. Always verify the clamp’s tightness before starting the machine. Keep the workspace clean to prevent obstacles from interfering with the clamping process. Proper clamping ensures precise results and minimizes the risk of workpiece movement during operation.
4.2 Drilling Techniques
Start by marking the drilling point clearly on the workpiece. Use a center punch to create a small indentation for accurate alignment. Select the correct spindle speed based on the material and drill bit size. Apply steady, consistent pressure while drilling, avoiding sudden force. For metal drilling, use coolant to prevent overheating. Maintain the drill bit’s perpendicular alignment to the workpiece. Avoid applying too much pressure, as this can damage the bit or cause breakage. Periodically pull the drill bit back to clear debris and avoid clogging. Ensure the bit is sharp for cleaner, more precise holes.
4.3 Handling Different Materials
Always choose the right drill bit for the material being drilled. For metal, use high-speed steel or carbide-tipped bits, while wood requires spade or forstner bits. Plastic drilling benefits from sharp, straight-flute bits to prevent melting. Adjust the spindle speed according to the material’s hardness—slower for soft materials like wood and faster for hard metals. Apply coolant when drilling metals to reduce heat buildup. For plastics, lower the feed rate to avoid melting. Ensure the workpiece is firmly clamped to prevent slipping. Use guide screws for wood to maintain straight drilling. Keep bits sharp for clean, precise holes in all materials.
Maintenance and Care
Regularly clean the drill press to remove dust and debris. Lubricate moving parts to ensure smooth operation. Check and replace worn or damaged components promptly. Refer to the manual for specific maintenance instructions to prolong the tool’s lifespan and performance.
5.1 Routine Cleaning
Regular cleaning is essential to maintain the drill press’s performance and longevity. Turn off the machine and allow it to cool before cleaning. Use a soft brush or cloth to remove dust, chips, and debris from the table, spindle, and pulleys. For tougher residue, dampen the cloth with water or a mild detergent, but avoid excessive moisture. Dry all parts thoroughly to prevent rust. Periodically clean the drill bit and chuck to ensure proper grip and alignment. Inspect the workspace and surrounding areas to remove any sludge or shavings that could cause accidents. A clean environment ensures safer and more precise drilling operations.
5.2 Lubricating Moving Parts
Lubricating the drill press’s moving parts is crucial for smooth operation and longevity. Apply a small amount of high-quality machine grease to the spindle, pulleys, and gears regularly. Avoid over-lubrication, as excess grease can attract dust and debris. Use a clean cloth to wipe off any excess grease from the surfaces. Lubricate the chuck key and arbor periodically to ensure easy tightening and loosening. Refer to the manual for recommended lubrication intervals and compatible grease types. Proper lubrication reduces friction, prevents overheating, and ensures precise drilling performance. Regular maintenance helps maintain the machine’s efficiency and extends its service life.
5.3 Checking Tool Condition
Regularly inspect the drill bits for wear, damage, or rust. Replace worn or damaged bits promptly to ensure precise drilling and safety. Clean the chuck and ensure it holds the bit securely; check the chuck key for wear. Align the drill bit correctly with the workpiece to prevent misalignment issues. Keep the spindle area clean and free from debris to maintain smooth operation. Inspect the overall condition of the drill press for any signs of wear or damage, addressing issues early to prevent major problems. Regular checks ensure optimal performance and longevity of the machine.
Troubleshooting Common Issues
Address common issues like drill bit slippage by tightening the chuck. Excessive heat during drilling may indicate incorrect spindle speed or dull bits. Ensure proper alignment to avoid misdrilled holes. Regularly inspect and maintain the machine to prevent recurring problems. Refer to specific sub-sections for detailed solutions to each issue.
6.1 Drill Bit Slippage
Drill bit slippage often occurs due to a loose chuck or improper alignment. Ensure the chuck is tightly secured to the spindle and the bit is properly seated. Use a drift key to remove and reinstall the arbor if slippage persists. Check for wear on the chuck jaws or keyways, as damage can cause slippage. Always verify that the drill bit is correctly sized for the arbor. If issues remain, inspect the spindle assembly for misalignment or damage. Regular maintenance and proper setup can prevent this common problem, ensuring smoother drilling operations and reducing downtime for adjustments.
6.2 Excessive Heat During Drilling
Excessive heat during drilling can damage the drill bit, workpiece, or machine. This often occurs due to incorrect spindle speed, dull drill bits, or insufficient coolant. To resolve this, reduce the spindle speed, use a sharp drill bit, and periodically remove the drill from the hole to clear debris. Apply cutting oil or coolant for metal drilling to reduce friction and heat buildup. Regularly inspect the drill bit for wear and replace it if necessary. Ensuring proper setup and maintaining tool condition will help prevent overheating and extend the tool’s lifespan while improving drilling efficiency and safety.
6.3 Improper Hole Alignment
Improper hole alignment can result from incorrect setup or uneven clamping of the workpiece. To avoid this, ensure the workpiece is securely clamped and aligned with the drill bit before starting. Use guide bushings or jigs to maintain accuracy. Double-check the drill bit’s position relative to the material. If misalignment occurs, stop the machine immediately to adjust the setup. Proper alignment ensures precise drilling and prevents damage to the workpiece or tool. Regularly inspect the drill press’s components for wear, as worn parts can lead to inconsistent alignment.
Leave a Reply
You must be logged in to post a comment.